7/31/08

Miscellaneous interior features 1

While I was stripping the trunk and floor I was also rounding up additional parts I wanted to install on my car to make it more like the TV cars as well as making it my dream ride. I purchased the deluxe light group harness, fittings and clock from John Haney at BlueOval.com and also picked up the deluxe dome light with map lights and a NOS power trunk release on eBay.

The deluxe light group consists of the underhood and trunk lights, ash tray and glovebox lights, driver and passenger side footwell courtesy lights and headlight and wiper control illumination. The in-dash clock also came with the necessary wiring to plug into the main harness.

The dome with dual map lights was actually part of the deluxe light group but it was a separate item from Blue Oval. Since the map lights were independent of the dome light, a dedicated hot lead had to be run from a hot tab on the fuse box up to the dome light assembly. To make identification easy, I used a red wire and let it run parallel with the dome light lead. Since the hot wire terminal of the maps and dome light circuits also served as the mounting point of the dome assembly, the screw had to be isolated from ground (the sheetmetal crossbrace), so I used a small square plastic insert (like the plastic nut used on license plate brackets) on two of the three mounting points. I drilled an undersized hole and rocked the bit from side to side to make the hole more obround to grip the insert securely. For the ground terminal I just drilled the correct size hole for the screw to thread itself into the roof brace.


The power trunk release also required a hot lead, so I made a piggy back connection with the map light at the fuse box terminal. Since the trunk release is a momentary load and a rarely used option, I doubt there will ever be a time that I have both map lights on and then open the glovebox and trip the trunk lock. Even if I do, the load will be brief.

The trunk light needed a hot feed too so I tapped into the red hot lead to the map lights. At the point where the wire starts up the sail panel, I cut into it and made a Y connection. One red wire runs on up to the map lights and the other red wire runs parallel with the black wire under the package shelf out to the deck lid and through the underside reinforcement to the lamp location and on to the trunk release.

Well that's all for this installment but stay tuned for more.....

ZEBRA 3 OUT
7/21/08

Flooring.... Part 2

With the trunk stripped, I moved to the interior. After removing the seats, carpeting, seat belts, carpet underlayment, wiring harnesses and drain plugs, I vacuumed the loose debris and got ready to go to town with the Scotch Brite pad.

On the subject of the Scotch Brite pads, remember to keep them moving in a wide area to prevent heat build up and potential sheetmetal warpage and they tend to wear away quickly on rough and irregular surfaces. If memory serves me correctly, I went through two and a half boxes of (50?) pads stripping the floor, trunk, damaged sail panel and roof area, the windshield and rear glass openings as well as using them to removed the trace particles of paint after using the paint stripper on the body. Oops, there I go again getting ahead of my story... more on that later!

Stripping the interior floor was just a bit more challenging with the various contours, reinforcements and brackets but nothing that wasn't easily figured out. Here are a few before and during shots of the interior floor....


With the floor and trunk stripped I moved on to the body. Next installment I'll pull the exterior trim, glass, ornaments, lights, etc in preparation for stripping the body. More to come....

ZEBRA 3 OUT

7/20/08

Flooring.... Part 1

I decided to start with the trunk floor first since it was the easiest to access (I hadn't pulled the interior yet). After removing the asphalt sound deadener pad, the filler neck cover, the body drain panels and moving the fuel level sending unit wiring harness out of the way, I mounted a maroon 3 1/2" Scotch Bite pad to my angle head grinder and set to work.

Really it was pretty quick and easy to remove the paint and surface rust from the trunk floor and wheelhouse. A couple things were accomplished starting on the "hidden" aspects of the body... first I got used to maneuvering the disc into different areas to get at the tight spots and it also allowed me to learn how to keep the disc moving so I didn't overheat the sheetmetal. The second aspect would be critical as I stated stripping the backside of the quarter panels and the tail panel so I wouldn't warp any exterior metal! Here are a couple before and during shots....


To keep this and future entries short, I'll pick up the stripping of the interior floor next installment. Stay tuned........

ZEBRA 3 OUT

7/13/08

Back on track....

Kinda got side tracked there with the seats, so let's see if I can get back on track. As I was saying earlier, my first project was to just convert the interior over to black. Pulled the seats, door panels, dash pad, package shelf, windshield post trim, side window interior trim, rear side trim panels and everything looked normal. I did notice a sticker on the driver's side rear seat quarter panel interior bulkhead but didn't think too much about it. I removed the sail panels interior trim panels and coat hooks and started removing the headliner and still nothing looked out of the ordinary, but as I started removing the sound deadeners the problem started to show.

When I removed the roof insulation from the area above the driver side rear passenger seat, the bondo pigtails became visible....


then when I pulled the insulation from the drivers rear sail panel area, the structural damage became evident.....


when I removed the seat back insulation sheet I discovered the driver's side package shelf reinforcement was slightly buckled as well....


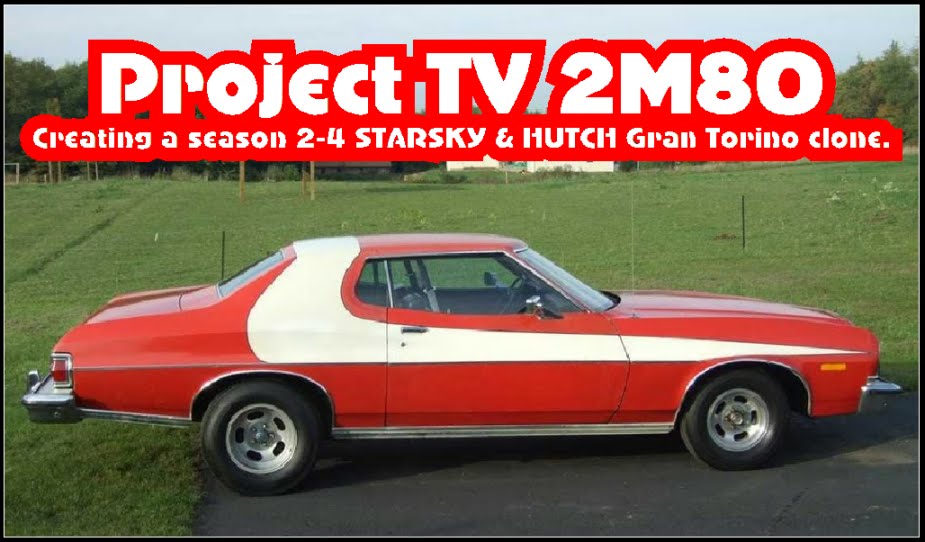
This was when I called upon the body shop manager for his evaluation and was advised if I were going to do this car right, I should just go ahead and do it all now and not have to pull the car apart twice. Well as I pondered my options I thought if I were going to strip this thing down to the bare shell, then I might as well rebuild the car in the configuration I would have ordered it in had I had the opportunity to do so back in 1976.

Since I had sent the VIN into Ford Customer Service and knew what the original factory installed options were and I knew I was going to clone the season 2-4 Hero cars, a visit to StarskyTorino.com revealed the Hero cars were also equipped with the following additional options:
Dual Remote Controlled Chrome Mirrors
Deluxe Light Group
Deluxe Bumper Group
Intermitted (Delay) Wipers
Tilt Steering Column
Illuminated Passenger Side Vanity Mirror
Power Seat
Power Windows
Power Door Locks
Electric Clock
Security Lock Group
Luggage Compartment Trim

Additional items to be installed during the rebuild will include:
Pioneer AM/FM/8 Track Supertuner In-dash Stereo radio (NOS)
5-Band Stereo Equalizer
Pioneer 5 way speakers
Motorola Micor 6 channel FM Police Radio with Microphone or Handset
Federal Signal Siren Controller with Dynamax Speaker
Southern Products Magnetic Teardrop Revolving Red Light
14 x 7 & 15 x 8 1/2 Aluminum Slot Mags
Hooker Super Comp headers
Flowmaster 40 Series 2 1/2" Mufflers
Complete 2 1/2" Dual Exhaust System

Now that I have a direction and a plan, the process of stripping, refinishing and optioning the car begins. I think I'll end this session right there and I'll talk a bit about the stripping of the floor & trunk in my next installment. Until then......

ZEBRA 3 OUT

7/4/08

My vision becomes a reality.... Part 2

With the buckets out of the truck and setting on the floor of the garage, I was really excited to see how well the rear seat turned out, so I removed the rear seat back from the truck and immediately hung it in place inside the car. She fit into position nicely so I went back to the truck and grabbed the seat cushion. After a bit of wrestling it into position to engage the floor hold downs, she finally locked into place. I stepped back and admired how well it had turned out! Played around with the arm rest and access hatch to make sure everything worked properly and even sat down into all three seating positions to insure they were comfortable.

Once I was happy with everything, I grabbed the camera and took some pics......


As you can see, they really are stock in appearance at first glance and only start to reveal their true identity upon closer inspection. I really want to thank JR for the outstanding job he did bringing my vision to reality!

The success of this portion of the project has really fueled me to build the Ultimate Starsky & Hutch Gran Torino of my dreams! Stayed tuned for more.....

ZEBRA 3 OUT

7/1/08

My vision becomes a reality... Part 1

With the design of the seats now firmly in mind, the next task was having them reupholstered to match my vision. I contacted a couple local upholstery shops and they wanted to bend me over the sewing table to make my ideas come to life.

I was just about to skuttle the custom interior idea until a friend I had met on the set of WE ARE MARSHALL when we were part of the vintage car extras for the film began telling me about the shop that had done the interior for his Rambler convertible. I placed a call to the shop and drove up the next weekend to check out his facilities and other examples of his work. Once I saw some of the work he had done and talked with him a bit, I knew I had found the one to handle the task.... if the price was right! After he showed me different materials and I made my selections, I told him I would go back home and e-mail him dimensions of the buckets and rear seat cushions so he could figure materials and labor.


Needless to say, two weeks later I was loading the seats into my brother's pick-up and heading to Parkersburg, WV to deliver the seats for upholstery. Before I loaded the buckets, I removed all the hard plastic panels so I could clean them good and redye them black myself and install new chrome edging around the panels. Above are a few before shots prior to loading. The seats were dropped off a couple weeks before Thanksgiving and I got them back just after New Years ('07).

Below are a few shots of the reupholstered buckets... they turned out better than I had imagined and once I get the hard panels back on, I think they'll really make my car stand apart. Next installment I'll show the rear seat installed back into the car.


Hope you like it so far because I'm loving it!

ZEBRA 3 OUT