12/31/17

Details 92...

Well more progress today... got the power antenna shield mounted onto the plastic fender liner...


cleaned the coolant overflow bottle (need to find something to bleach the plastic back to it's natural color)...


and got the undercoating of the back of the driver fender (had to use a putty knife and a scotch brite pad)...


and got the backside completely blasted and started on the outside of the fender. Got the hood return...
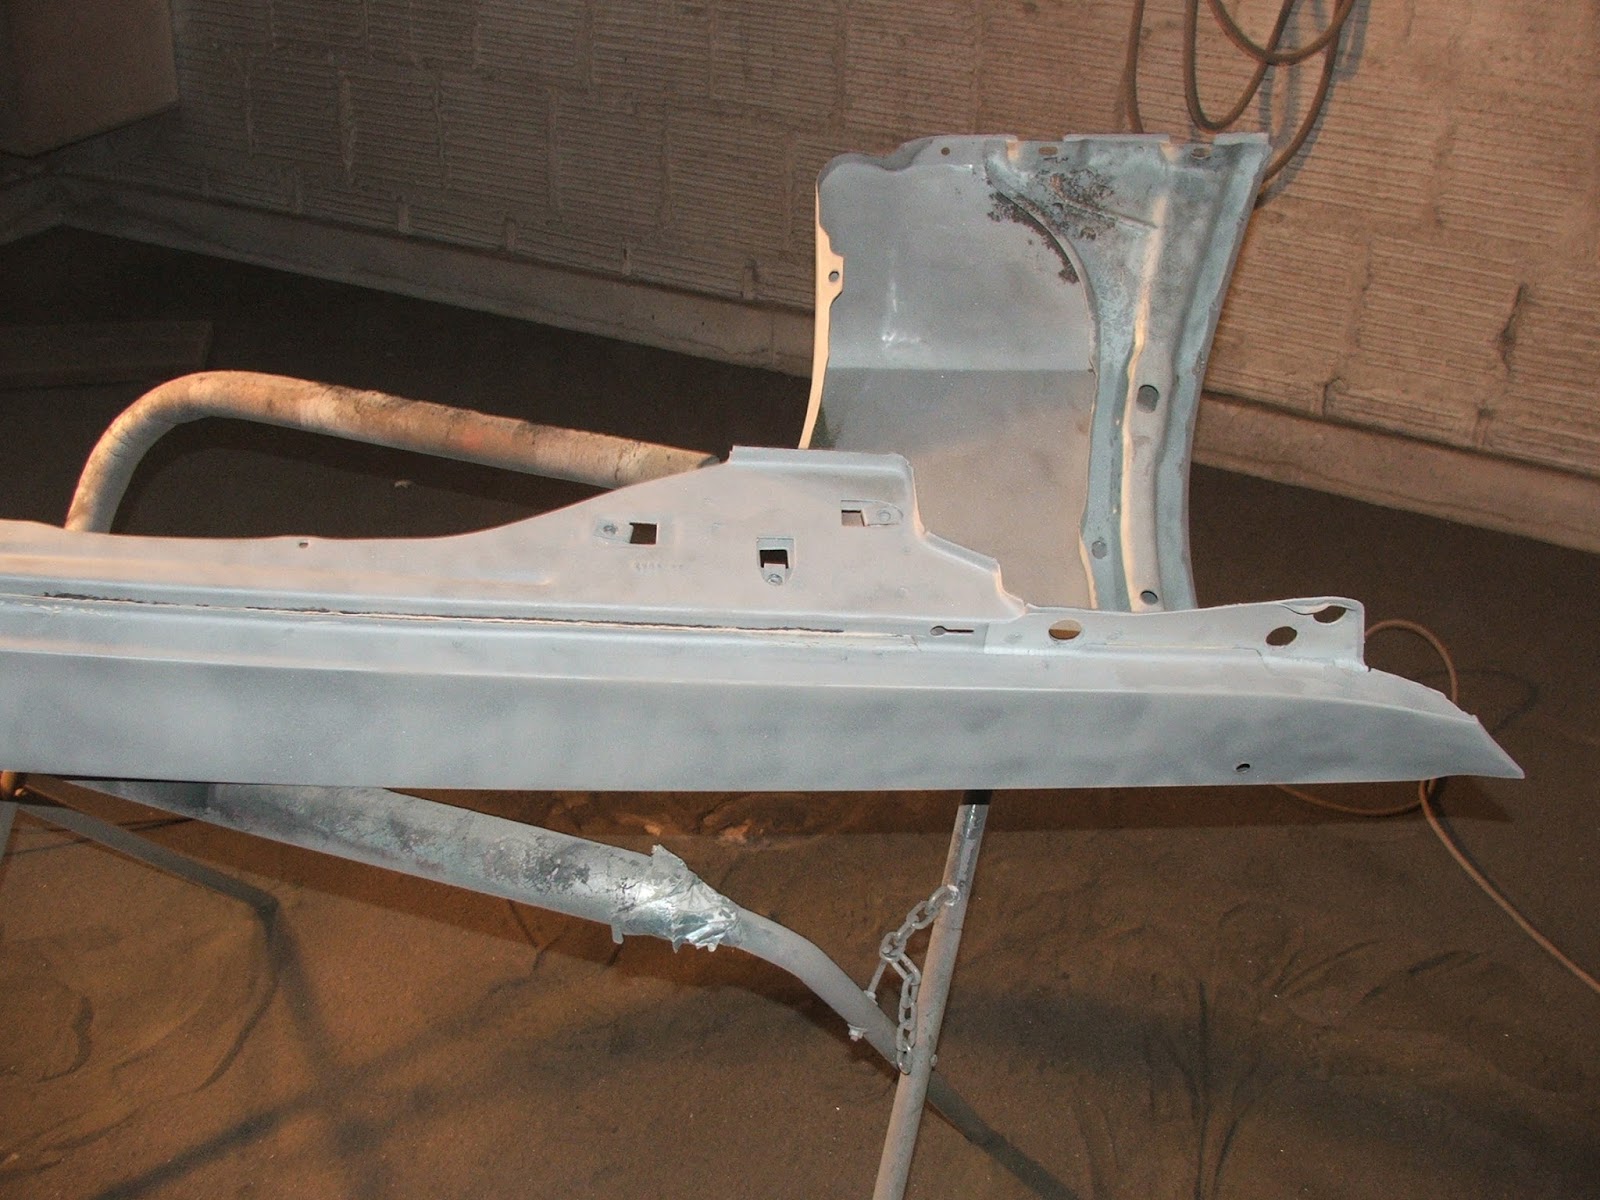


fender top...


nose section back to and around the wheel opening.


Will get the rest of that knocked out next weekend and then I'll treat all the naked sheet metal with Ospho to protect it until it's time to shoot the primer.... not much longer now!!!!

More to come.....

ZEBRA 3 OUT

12/17/17

Details 91....

Well Saturday wasn't as productive as I had hoped. I got all the sand vacuumed up and sifted into three 5 gallon containers ready for use and thought I'd change the desiccant filter on the blast gun before getting underway.

I pulled the old filter off and installed the new one onto the gun and set it on the fender awaiting getting the blast hopper filled and the fun underway. As I filled the hopper and moved it into position to begin, I inadvertently knocked/pulled the gun off the fender and busted the brand new filter! I checked the old one and it looked to have a bit of life left in it (the desiccant beads hadn't fully changed colors yet) so I bit the bullet and reinstalled it.

Well it wasn't long until I was fighting the moist air situation of the media not picking up as it should, but I endured and got the majority of the backside of the fender blasted.

Whoever was working the undercoating the day my fender was coated put a nice heavy coat on the area behind the wheel well because the media wasn't cutting it like it did on the nose of the fender... not sure if it was that much heavier or the sand not being fed to the gun as it should, so I'll make a run to Harbor Freight and pick up three or four of the inline filters and hit it again once the flow is back up to speed and see how it does. After 40+ years and still adhering that well, I may just leave it alone.
Also need to reposition the lights a bit so I can see better into the fender back side as I'm blasting because I see a few areas that still need addressed....


Until next time......

MERRY CHRISTMAS TO ALL

ZEBRA 3 OUT

12/10/17

Details 90....

Well Saturday went extremely well! Took a scotch-brite wheel to knock down the jacking instruction decal then proceeded to finish blasting the underside of the deck lid...


then propped it up on the panel stand...


and spent about an hour vacuuming the sand out of the inner structure! LOL, I think I got about 99% of it.

Set it out of the blast booth, filled the hopper and moved the driver side fender into the booth and started on the back side first. It's actually fun and therapeutic when everything works as it should! Just had to bump the hopper a few times as the media level got low to loosen the sand up a bit so it would cascade to the bottom. Got about 75% of the backside finished before running out of sand...


Knocking off the undercoating takes a bit of time and material, but it slowly yields to the sand! LOL
Next weekend will begin with vacuuming and sifting the media (one last time hopefully) and hitting the fender backside until clean and then flipping her over and doing the outside!

Don't touch that dial!

ZEBRA 3 OUT

12/3/17

Details 89...

More progress this weekend.... vacuumed up the sand, sifted and reloaded the hopper and got the underside of the deck lid blasted. Kinda a short day because had to get home and cleaned up for the company Christmas party.


Need to get all the remnants of the jacking instructions removed and hit a few areas inside the bracing before treating the hidden areas with Eastwood Rust Converter, applying some POR-15 to the inner seam areas and the applying new seam sealer.

Will get the decal and inner structure taken care of next weekend and the get started blasting the driver side fender....

Until next episode....

ZEBREA 3 OUT

11/26/17

Details 88....

FINALLY a bit of progress!

After messing with the oil/water traps in the blast booth for a bit (have been neglected for years and I need to order some additional pieces)...


I attached a longer air hose to the blast cabinet air line and pulled it into the blast booth and attached it to my new sand blast gun.


Was able to get about half of the underside of the deck lid blasted before running out of sand...


so next weekend I'll be vacuuming up and sifting the sand in the blast booth before wrapping up the deck lid and moving on to the next piece.

I also blasted a few parts in the blast cabinet before calling it a day.

I guess the problem with my old sandblaster was that it was just wore out after may years of faithful service. I also converted my new gun from a siphon tube style to siphoning the sand from the bottom outlet of my old sandblaster hopper. Was working really well until the sand was depleted....

Fingers crossed that I get the deck lid finished and can get started blasting on the LAST major piece of sheet metal... the driver side front fender.

Until next episode...

ZEBRA 3 OUT

11/19/17

Details 87...

Well on the Torino front, not much progress this weekend. I did get the charcoal canister rehung...


and added a few more quarts of fluid to the C6 on the recommendation of my transmission guy.

I added the desiccant filter to the blast gun without much success, but then again I didn't spend much time trying to debug it because I was helping my buddy install new vent pipe on the oil burner furnace at the dealership.

Hopefully I can get it figured out next weekend and wrap up the deck lid stripping and get started on the driver side fender.

WISH ME LUCK.....

ZEBRA 3 OUT

11/12/17

Details 86....

Well another unproductive weekend, but I think I've found the solution to my sandblasting problem.

Another weekend trying to blast that was filled with frustration. I drained the air compressor as well as the air line filters into the blast booth, but could not get the sand to pick up. Then I remembered the disposable water trap I had installed on my paint gun, so I removed it from the paint gun and attached it to the blast gun air line and the media began to flow!

Got about 1/3 of the seam sealer blasted from the underside of the decklid before the media stopped flowing.....


I called O'Reilly's and ordered two filter elements for the Sharpe oil/water traps installed on the hard lines and will make a run to Harbor Freight this week to buy a couple of their inline desiccant dryer/filters to see how well they perform at resolving my moisture issues.

I also noticed some areas on the underside of the decklid that Ford missed as well as the 2B respray a few years ago..


Seems with the decklid mounted on the car, it must be difficult to see to hit the backside of the rearward decklid bracing. I'll make sure mine gets painted as all the body panels will be painted off the car and rehung during final assembly.

Well hopefully next weekend will be much more productive and I'll get the Tomato that much closer to going to the body shop for final fit and finish.

Fingers crossed!

ZEBRA 3 OUT

11/5/17

Details 85....

Well after having a very unproductive October, had a bit of progress this weekend... we got the rear brakes bled, the wheels back on and the Torino is ready to set down on the ground.

I then moved into the blast booth and fought with the sandblaster. Seems I forgot to turn off my air line the last time I blasted and both water traps were full of water. I drained them both but evidently there was still moisture in the air lines because I could not get the media to get siphoned into the blasting pickup line, so I reverted to the old scotch-brite pad on the angle head as well as the DA to get the remaining paint off the top side of the deck lid.


I did use the sandblaster to blow off the decklid once and the media started to be picked up, so I was able to do a bit of sandblasting on the remaining paint until I stopped to answer my phone. Once I finished and resumed trying to blast, evidently the moisture had built back up in the line so I had to revert back to manual stripping. Need to check on perhaps getting new desiccant for the Sharpe water traps???

Next weekend, I'll flip over the deck lid and blast (hopefully!!) underside and then start on the driver side front fender. Once the fender is clean, all body sheet metal will be stripped and I can protect and prep it all with a coating of Ospho until the Tomato is back into the body shop.

I like the sound of that!!!

Stay tuned....

ZEBRA 3 OUT