10/15/17

Details 84....

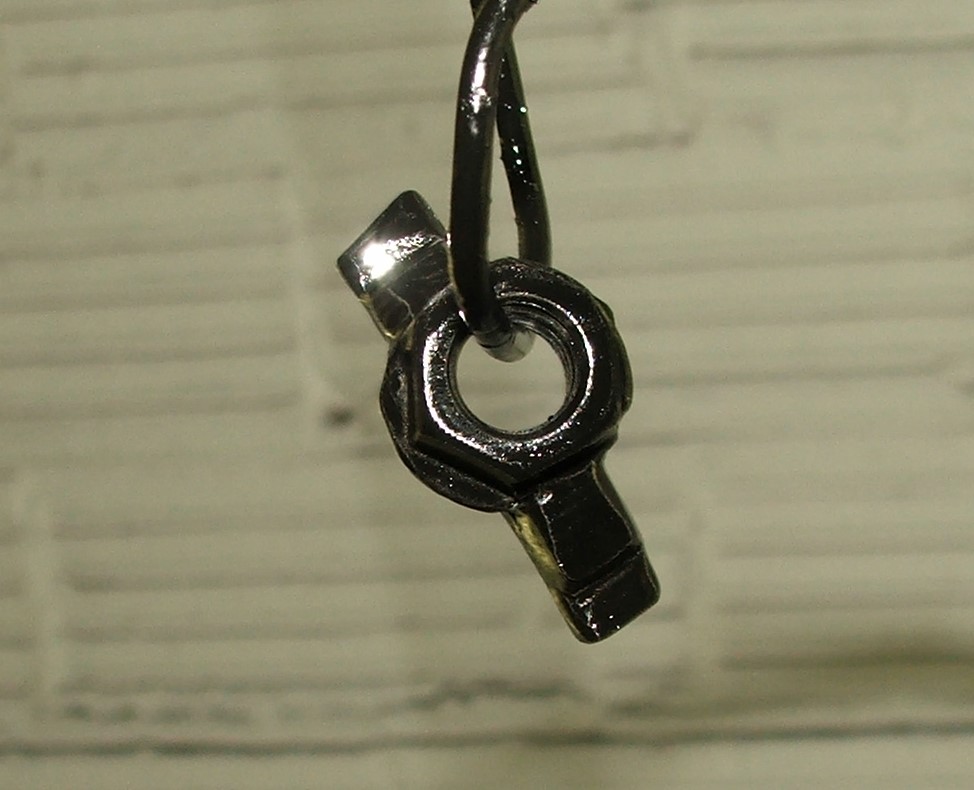
A wee bit of progress this weekend... CaliforniaJohnny sent me a proportioning valve like is on the Tomato.


It allowed me to make a distribution piston stop (install in place of brake switch to keep the piston centered while bleeding) as well as determining how to recenter the piston in my proportioning valve.


Simple as taking a 3/32" dia round (the cross bar from a wire coat hanger in my case!)


and gently tapping the piston forward in the distribution block until the center divot was visible in the switch opening.


I'll install the stop to keep the piston in place until we get the back brakes bled. Once both systems are bled and I have a firm pedal, the stop will come out and the switch installed back into it's proper home.

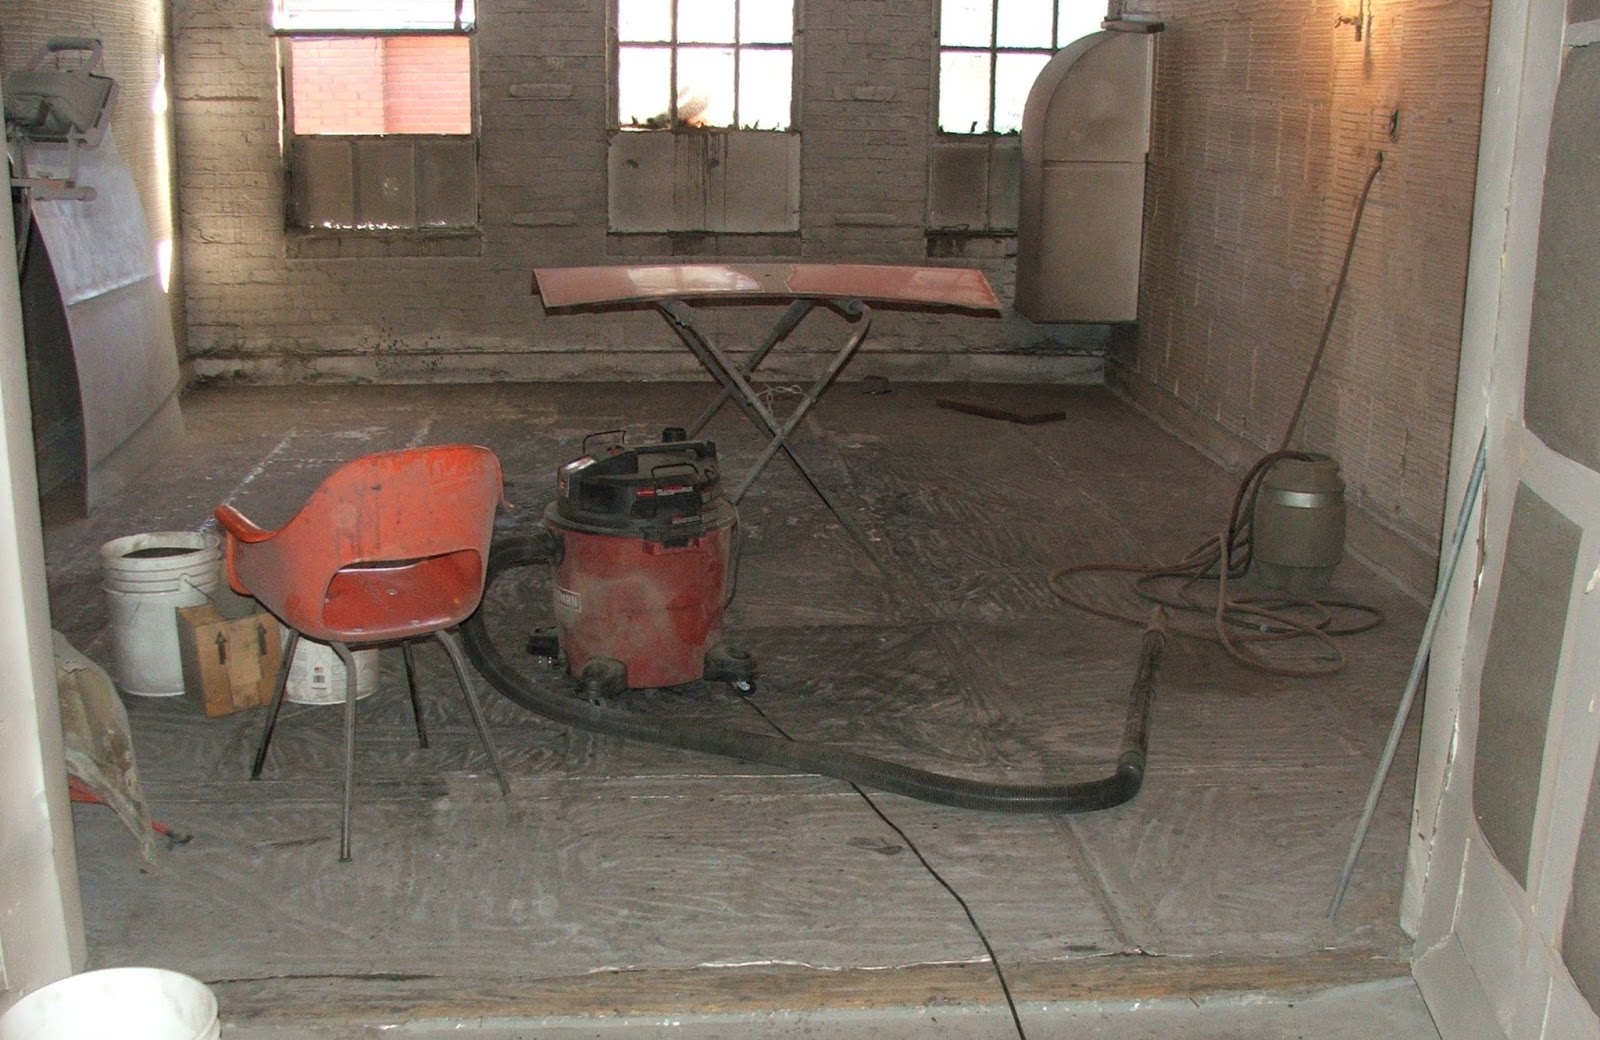
Once that was finished, I went into the blast booth and blasted a bit more on the deck lid. Just about finished on the outside...


then I'll flip it over and do the inside. Oh what fun!

The next two weekends will be unproductive... I have a doctors appointment next weekend at the Cleveland Clinic and the following weekend is our annual wedding anniversary Halloween party.

Until next installment....

ZEBRA 3 OUT

10/1/17

Details 83....

Well Saturday sucked sand..... NO REALLY, I sucked sand most of the day! LOL, I had to vacuum up all the sand from the blast booth so I could continue blasting the deck lid and a few other major components that can't fit into the blast cabinet. Had I remembered, I could have done that last Saturday while recuperating from elbow surgery rather than waiting around at the house for F3 to let me know they were at the shop to pick up my windshield and heated back glass!


Here is my little bucket blaster that has served me well in blasting the undercarriage and other larger items on this build


as well as our blast cabinet for the smaller stuff.


Once I was finished vacuuming and sifting the sand into 5 gallon buckets, I check my alternator captive nut to verify it would work as envisioned


and got that all put together


and then hung the rear tires back on the dormant T'bolt tribute project to once more have it a mobile project.


Next weekend hope to get the sheetmetal blasting all knocked out.

Until then....

ZEBRA 3 OUT

9/17/17

Details 82....

Saturday was pretty much a wasted day... waited on someone to arrive at the body shop so I could pick up my windshield and rear glass but they never showed up. Got to the dealership a bit after 1, so I worked on a few miscellaneous tasks that needed to get done..... stripped the paint off the trunk springs...


made the captive nut for the alternator adjustment arm...


and disassembled and blasted the cruise control servo...
 

so there was SOME PROGRESS! I also drug out the front & rear bumper reinforcements to see how I could reduce their mass and weight by a cutting away some of the metal.
 
More to come....
 
ZEBRA 3 OUT

9/14/17

Details 81...

Another fun filled day of sandblasting!! I finished the hood...


and started on the deck lid.


A bit of surface rust on the underside of the metal...


and a remnant of the CB days,


but nothing major. Hit the edges and corners first to make sure there was no major rust in those spots before proceeding with the rest of the lid.


My lil' hopper blaster...


is a bit slow but at least I know it won't damage the sheet metal... but she gits-r-dun!

Until next installment...

ZEBRA 3 OUT

8/28/17

Details 80....

A bit more progress this weekend, picked up my polished front rims (shown before & after) from Irwin Polishing...


and my brutha Jim got them mounted for me...


and I got them installed on the car.


I also finished assembling the hood latching reinforcement...


removed the modified Fiero vacuum canister from the paint booth and placed aside for later use...


made a jumper wire for the dual horns and tapped into the alternator harness to mate to the factory wiring harness.

I fitted my alternator adjustment slug...


into the adjuster bracket...


so I could make my captive nut to wrap up my 3G alternator installation.


We also got the braking system bled but the rear brakes wouldn't really bleed out like they should, so I'm thinking I may need to reset the proportioning valve.

Stay tuned, there's more to come!

ZEBRA 3 OUT

8/20/17

Details 79...

More little stuff taken care of... got the center brace, hood latch and siren brackets installed onto the core support...


the jumper installed between the distribution block and the starter solenoid...


removed the tail light fillers and the windshield stop out of the spray booth...


installed the locking hood release...


and got about 90% of the hood blasted.


On my way home, I stopped at O'Reilly's and picked up a couple rolls of #16 ga wire so I can make a jumper for the dual horns as well as tapping the 3G alternator harness so I can connect it to the factory harness.

More baby steps toward getting her ready to turn back over to the crew at Far From Factory for final bodywork and paint!!