10/20/08

Stripe template

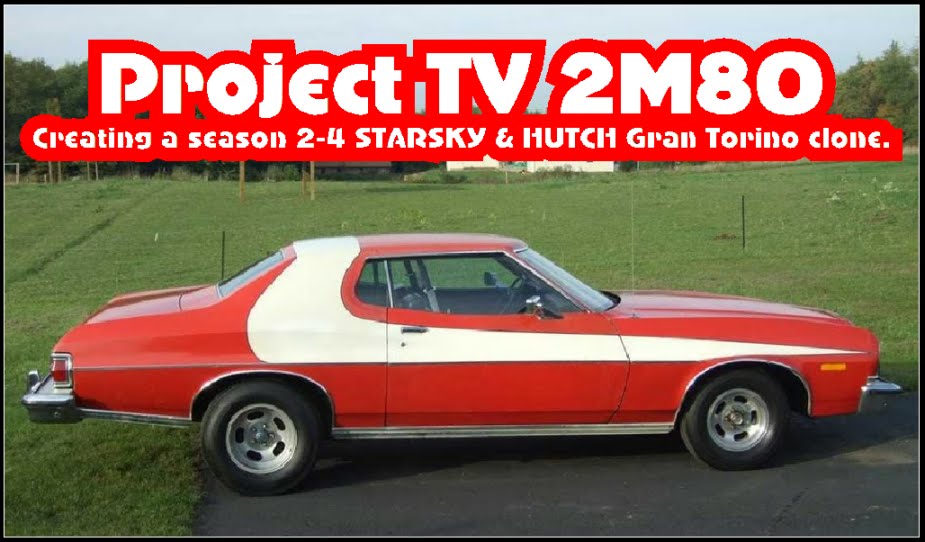
While I stripped the paint on the driver's side, I thought I'd play around with making my own stripe template. I'm a draftsman by trade so I'm used to laying things out to insure they work before making them. I'm also very anal about details and one thing I wanted to be sure of was that the stripe was exactly the same on both sides of the car, so I decided to create the stripe full size in my computer and then plot it out and trial fit it on the car until I had it exactly like I wanted it. Then it would be just a matter of mirroring the design to make the other side exactly like the first. It took me a few attempts to get the swoop similar to the TV car but I think I got it pretty close.

Here are some shots showing my template progressing toward the final design......

I pulled a revised swoop using 1/4" pin striping tape and stuck the side moldings on with tape to form a base line design for me to enter into the computer...


With the baseline design loaded, I plotted off the first pattern and then kept modifying until I had the swoop like I wanted....


Once I had the swoop like I wanted, I plotted out the final template and started forward....


I was now pretty happy with the way the stripe looked. Was still a bit difficult to imagine the full effect because the old stripe was still visible, but once I got the passenger side stripped, it became pretty clear....


I originally did the point like the factory Limited Editions, but after seeing the stripe against the solid color of the bare metal, I reminded myself I was cloning the TV cars so I went back and tweaked the point to match the season 2-4 cars.......


I have plotted out the new point but haven't trimmed it nor attached it to the car to verify it's 100%. I'll be pulling the fenders off in the very near future so I may go ahead and trim the fender template and stick all the other templates and trim back on the car to have one last look before I knock off the nose. I'll post a picture of the final design when I do.

Until next time........

ZEBRA 3 OUT!

10/16/08

Take it all off!

With the driver side done, I turned my attention to the roof and then the passenger side. I misted the POR-STRIP on and let it do it's thing and the paint blistered and released from the sheet metal. Then I used my plastic spreader to scrape away the paint and followed up with a second coat to remove any remnants that might have been missed by the first application.


The hardest part of the whole stripping process was fighting with the fricken spray bottle!! The first bottle I got with my initial gallon of POR-STRIP worked like a champ. A buddy was doing a little project at his home that required stripping some paint, so I gave him the last bit of my first gallon and the sprayer. I had already ordered a second gallon, so I called my local POR-15 rep and had him to bring me another sprayer when he delivered my order. The sprayer worked as it should at first but then it started acting up and not wanting to spray. I first thought the filter on the pick-up was getting clogged so I removed it. Worked for a while then it started acting up again, so I removed the spray assembly and cleaned it out and tried again. As before it worked for a while then petered out.

In frustration, I called the POR-15 rep and told him I was having problems with the sprayer and he said he would bring me another, so I called it a day before I really got mad and broke something. In about 5 hours, all I got done was the roof.


He delivered the new sprayer during the next week and so the following Saturday I started on the sail panel and rear quarter. Just like the previous week, the sprayer started off performing great. Actually got the sail panel stripped and was doing the second coat when the sprayer started acting up. So I cleaned it out and again it started working correctly... for a short time.


I told myself I wasn't going to fight it like I had done the week before, so I immediately called the rep and told him it was happening again. I asked him to call the factory and see if they had run into this problem before with the sprayers and he said he would. He called me back a bit later and said they were aware of the problem and what was happening was the POR-STRIP was basically eating the guts out of the sprayer and they didn't have a solution other than to brush it on!

He said he had another source that had industrial sprayers and he would get me one to try and see if it worked any better. He wanted to find a sprayer that would work with the stripper so he could really push the product at car shows and to restorers so I agreed to try it out for him. Again it would be later on in the week before he could get it to me, so I finished up the sail panel and played around with other things on the car for the remainder of the day.

The following Saturday, I began again with the new type sprayer. Started misting the quarter and adjusting the sprayer until I got the right pattern going. Once the ideal pattern was tuned in, I really went to town applying the stripper. Rather than shooting the entire panel at once, I started from the rear and worked my way to the door opening applying the stripper between the sculpt line to just above the wheel opening. once I had that area pretty well stripped, I proceeded to apply the POR-STRIP to the lower portions of the quarter. I finished the lower rear half of the panel then the lower front half. Once the quarter was finished I stripped the door jamb area.


From the quarter, I went to the door and once the door was done I did the front fender. As I started the front fender, the sprayer began to spray erratically. I fought it long enough to get the first coat on the upper portion of the fender, then while the stripped was doing it's job, I cleaned the sprayer in preparation for the second coat. Once I had scraped the upper portion of the fender I applied the second coat to the top and went ahead and applied the first coat to the center portion of the fender. As I was finishing the center section the sprayer started spitting again, so I limped it along until I had the panel done.


I thought to myself that I was almost done and to just keep nursing it until it won't spray any more before giving up, so I cleaned it out once again. Again I scraped off the previous application and went right into the second coat/first coat on the balance of the fender. I kept pushing it until I had applied the stripper to the balance of the panel then I once again cleaned out the spray assembly.

When it was time, I removed the loosened paint and applied the final application of the POR-STRIP, all the while counting to ten as it spit and spattered the stripper onto the fender until finally I was done.

I wanted so badly to throw the bottle across the shop into the wall, but I knew the type of luck I have! I could just imagine the bottle hitting the wall and splitting open and showering several of the new or classic cars stored nearby with paint stripper and the hot water I would THEN be in!! But I just set the bottle down on the work bench and counted my blessings that I was done applying the stripper... for now anyways! Still need to strip the hood, header panel, headlight buckets, deck lid and the bumper sight shields, but those can wait until another day (and spray bottle!!).

Once I had gone over the fender with the scraper, I wiped down the entire passenger side of the car with a wet towel to remove any remaining stripper. I also discovered the ONLY rust on the entire body of my car. It's low on the passenger fender just ahead of the lower front corner of the door and just behind the rocker molding. Roughly the size of a playing card and my guess is from leaves collecting inside the fender and rusting it away from the back side.


With the stripper removed and the car wiped down, I then put a fresh Scotch-Brite wheel on my angle head grinder and lightly polished the newly exposed sheet metal to finish off any paint or body putty that might have been left behind. Speaking of bondo, the POR-STRIP will also remove it as well. Depending on how thickly it has been applied, the stripped will loosen it from the metal and it will scrape off just like the paint will, but you may have to apply several applications to remove any real heavy build up.


Next step is to take the car downstairs to the wash bay and wash her down with plenty of hot water and a good scrubbing with a Scoth-Brite pad to get all of the POR-STRIP removed from all the nooks and crannies of the body to insure good adheshion of the two-part epoxy primer I will be applying... or I should say having applied. Don't know just yet what my painting skills are. I have purchased a cheepie automotive paint sprayer as well as a touch-up gun, so I might give at least the primer a shot. I figure I couldn't mess up too badly applying the primer... after all it'll be sanded and reprimed many times until the body is straight.

That's all for now.......

ZEBRA 3 OUT!
10/8/08

Take it off.......

After using a Scotch-Brite wheel to strip the damaged area of the roof and sail panel, I knew that's not how I wanted to strip the body. Created WAY TOO MUCH dust plus there was a question of how much heat the sheetmetal could withstand before it started to deform.

I have used POR-15 products in the past and was going to use their paint to coat the floor and chassis, so I looked through their catalog to see what they had to offer. I discovered their POR-STRIP paint remover so I called my local rep and ordered a gallon along with a spray bottle. The stuff has the consistency of water and the catalog said it wouldn't harm aluminum, fiberglass, window glass, chrome or weatherstripping.

The product arrived and I donned my heavy rubber gloves, respirator and safety glasses, grabbed my funnel and after shaking the POR-Strip vigorously for several minutes, I filled the spray bottle and got to it. Since I was working a vertical surface, it took me a few minutes to get the sprayer adjusted so it sprayed a fine mist onto the panel helping the stripper stay in place while it got busy releasing the paint.

Watching the stripper work reminded me of watching a horror flick when someone splashes holy water onto a vampire or acid onto someone's skin (well, minus the smoke of course!). At first it doesn't appear to be doing anything then gradually a blister will start to appear and begin to spread across the panel. The paint begins to wrinkle up and fall off the panel practically by itself!


After letting the stripper work for several minutes, I used a plastic spreader as a squeegee to scrape away the paint. A second application was applied to insure I got everything off. I worked one panel at a time starting at the sail panel and doing the rear quarter first before moving on to the driver's door and finally the front fender.


Once the paint was gone, I wiped down the area with water to neutralize any remaining stripper, then went over the panels lightly with a Scotch-Brite wheel to remove any remaining paint. Once I had the panels clean, I applied a coat of POR-15 Metal-Ready to prep the surface for future paint as well as protecting it in the interim from developing any surface rust because of the zinc phosphate coating left behind when the Metal Ready dries.


With the driver's side stripped, it was time to work across the roof and down the passenger side. I'll cover that next time.

Stay tuned......

ZEBRA 3 OUT

10/7/08

Strip it....

With the interior and trunk floors stripped, I thought it was time to look into the bondo pigtails on the roof. So with a 3 1/2" Scotch-Brite wheel mounted in my trusty angle head grinder, I set about sanding away the paint on the driver's side sail panel....


To speed removal of the bondo in the damaged area, I used a rubber mallet to hit the underside of the damaged area to break the filler loose from the sheet metal. I was then able to remove the majority of it in large sections by using a screwdriver to get under the putty and gently pry it away from the roof.

With the bondo ground away, I discovered two things. First, that the roof had suffered a severe blow in some manner and second, I was going to have to find another way of stripping the paint from the body because using the Scotch-Brite wheels created too much dust and more heat in the sheetmetal than I would like. In the following two pics, you can see the damage to the roof section and in the second you can see a couple pieces of the bondo removed from the roof (laying on the rear window package shelf between the left side speaker opening and the center defogger opening). At it's thickest point the bondo was about 3/16"-1/4" thick. Don't know how long it had been in place but it was still attached very securely to the roof metal.


Next installment, I show the rest of the paint being removed from the body.

Until then.........

ZEBRA 3 OUT

9/25/08

Miscellaneous interior features III... conclusion

First, I like to thank everyone for their comments. Nice to know people are actually watching my progress! One of the suggestions I received was to be a bit more magazine oriented for those with a short attention span. This would have been an ideal installment to do as a HOW-TO feature but I already had everything fabed, installed, working and disassembled before I got the suggestion, but I promise to try one in the coming posts.

With the power seat and windows installed it was time to turn my attention to the last of the power options; the Power Locks. There are only two visible clues to a Torino being power lock equipped...


The first is the lock button head which reads POWER LOCK, and second are the two rivets in the trailing edge of each door that hold the solenoid bracket in the door. The factory system didn’t use a switch to lock and unlock the doors but rather the lock plunger served as the switch. I was unsuccessful in locating an OEM set-up so I started surfing the web and eBay looking for a system that functioned in the same fashion. I discovered this system on eBay for two door cars...


It operates in the same manner that the factory system does. The kit included two solenoids, harness, control module and various links and hardware to install the system along with the wiring diagram and instructions.

The first order of business was to install the solenoids. As a starting point, I drilled out the two pilot dimples in each door for the factory mounting brackets....


then I determined how far into the door the solenoid had to be to push-pull directly on the lock plunger rod. With the dimensions in hand, I designed my bracket and cut a pattern out of heavy cardboard to confirm my design. Once I had it like I wanted, I loaded the design into AutoCAD, mirrored it for the opposite side of the car and converted it so I could have them laser cut at work. I used 11 ga stainless steel for rigidity, strength and durability. The finished brackets are EXTREMELY strong and I won’t ever have to worry about them rusting or being too flimsy to operate years from now.


With the solenoid brackets out of the way, it was time to decide where to locate the control module. Since both solenoids had to wire to it, I knew it should be somewhere in the middle of the dash. I had my dash pad out of the car, so I could see behind the dash clearly and I noticed the dash reinforcement above the glove box with the red seat belt/key buzzer mounted to it. I removed it and designed another stainless steel bracket to mount to the reinforcement that would allow the control module to be mounted close the buzzer and easily accessible thru the glove box opening once the liner was removed.


With the brackets all in place it was time to get busy and start mounting everything. I inserted the solenoid link into the top hole of the solenoid plunger and temporarily mounted the solenoids to the door brackets with a few wire ties so I could readily mount or remove the solenoids without much effort. The solenoid link must be formed to run parallel to the lock plunger rod so it can be attached to the rod via a block with slotted openings for the plunger rod and solenoid link. The shafts are locked in place with set screws.


With the solenoids in place, the control module mounted to it’s bracket and the reinforcement reinstalled between the dash and cowl, it was time to prepare the wiring harness.

The first order of business was to identify and separate the two individual circuits, then wrap them with vinyl loom wrap to simulate a factory wiring harness. Once wrapped, I plugged the harness into the lock control module and ran the two circuits to their destination. One thing I discovered once the circuits were run was the supplied harnesses weren't long enough to reach the solenoids (I guess the kit was designed for the smaller cars of today and not vintage American vehicles with doors that are over three feet long!). To remedy the problem and to give me a connection for the power locks at the door harness kick panel connection, I got a multi-conductor (5 wire) cable to connect between the lock solenoid and the cross cabin wiring harness at the kick panel.

I ran the cable along the same route the OEM lock harness ran across the outside of the door then into the door and through the rubber cable boot between the door and the hinge panel. The kit harness used bullet connectors for plugging everything together, so I made a trip to Radio Shack to pick up the appropriate size connectors. I installed the new female connectors on my new door harness and plugged the wires into the lock solenoid harness. At the kick panel connection, I had to shorten the cross dash harness to eliminate some of the excess kit harness length and installed the necessary bullet connectors and plugged all those connections together.

The final two wires to connect were the hot and ground leads. I used the ground connection for the blower motor behind the dash on the passenger side as the ground point for the lock circuit and picked up my hot signal from the hot connection for the glove box light and power trunk release.

The moment of truth arrived and the locks functioned beautifully once I fine turned the connecting link between the solenoid and the lock plunger to eliminate a slight binding between the two. A nice feature I hadn't though about was that since the solenoid operates off the lock plunger, when you unlock/lock one door with the key it does the same to the opposite side. With everything installed and operational, it was time to pull it all back out for detailing and lubrication.

I located some original style rivets to use for the final assembly and the crowning jewel for the installation was a set of NOS Power Lock buttons.....


Once everything is installed for the final time, unless you pull the door apart and look at the components, you won't know it's an aftermarket power lock kit... Very covert system!

Until next time........

ZEBRA 3 OUT