4/16/12

COME AND GET HER

Busy day on Saturday getting all the sheetmetal rehung and all the various parts ready for Far From Factory to pick up this coming weekend! Want to thank my son Brandon for lending a hand reattaching the fenders and hood and for assisting in setting the roof skin back in place without damaging the roof brace pads....


OK Far From Factory.....

COME AND GET HER!!

Stay tuned for the latest.

ZEBRA 3 OUT

4/9/12

Almost there 2......

Well I got the roof skin and bracing wrapped up this weekend. Sandblasted the POR-15 off the roof pinchweld area then masked them off and shot the underside of the skin.


With the roof and bracing all painted and ready to go, I turned my attention to applying the new roof brace pads. Damn it's tough getting old because I didn't have my reading glasses with me on Friday, so I could not see the original staple holes to punch thru into the new pads, so I had to wait until Saturday to install them. But come Saturday and with my glasses on, I had the new pads installed in about an hour. I was VERY PLEASED with how they turned out. Really has the OEM look that I was after!


As you can see, I have the deck lid reinstalled in preparation for the guys from Far From Factory coming to pick up the Torino. I still need to drop the fuel tank and rehang the balance of the sheetmetal so they will have it all available to get everything aligned. It's getting closer and closer to the day when she's off to get her body massage!

More to come.....

ZEBRA 3 OUT

4/4/12

Almost there.....

With Far From Factory on board to handle body and paint, the ball was in my court to get a few tasks wrapped up so they can come and pick up the Tomato and get started. The little odds and ends I had to take care of are to get the isolation pads duplicated for the roof ribs, paint the roof structure and underside of the roof skin, finish removing the excess material from the donor parts and get all the body panels ready for the guys to take with the car.

The first order of business was to paint the roof structure. I first masked of the areas where the roof skin will be welded in place and then shot the ribs and window headers black.


Next was to paint the underside of the roof skin, but before I could shoot the bottom of the roof black, I wanted to strip off the POR-15 from the lip that will get welded to the roof frame. To cut the POR-15 quickly, I pressed the old bucket sand blaster into play, but as luck would have it, I ran out of sand about 3/4 of the way around the lip. So I will stop and get another bag or two of BLACK BEAUTY blasting medium this week to finish up the skin as well as having the material ready when the car comes back so I can blast the rest of the frame and underbody.

To replicate the roof isolation padding, I sandwiched three layers of 15# roofing felt together using black spray Plastic Dip. I found a roll at the dealership that had been there for YEARS! I was sure all the tar smell had been burned out of it during the summers because temps can reach well over 100 degrees on the second floor of the dealership. The three layers of 15# felt were a perfect replica for the OEM material used to keep the roof skin from vibrating against the roof skin.

With the replacement material at the ready, I laid the original pieces on top and traced around them using a sharpened welding flat soap stone. I then took my utility knife and a metal yardstick and cut out the pieces. To cut the 6 round clearance holes in two of the pads, I used a 1 3/4” hole saw and worked the saw thru the felt by hand and before long I had all my pads replicated.


The final step will be to “staple” them back onto the roof ribs. My plan is to lay them in place and, using a tiny drill bit, drill thru the material from below using the original staple holes as my guide. I will then use short pieces of mig welding wire to imitate the round factory staples and insert the new staples in from above and bend the tabs over to keep everything in place.

So this weekend will involve installing the roof pads, finishing up the roof skin, removing the excess material from the donor wheelhouse and getting everything lined up for the guys at Far From Factory to come and take my baby away for a few weeks.

STAY TUNED……

ZEBRA 3 OUT

3/20/12

SUCCESS!


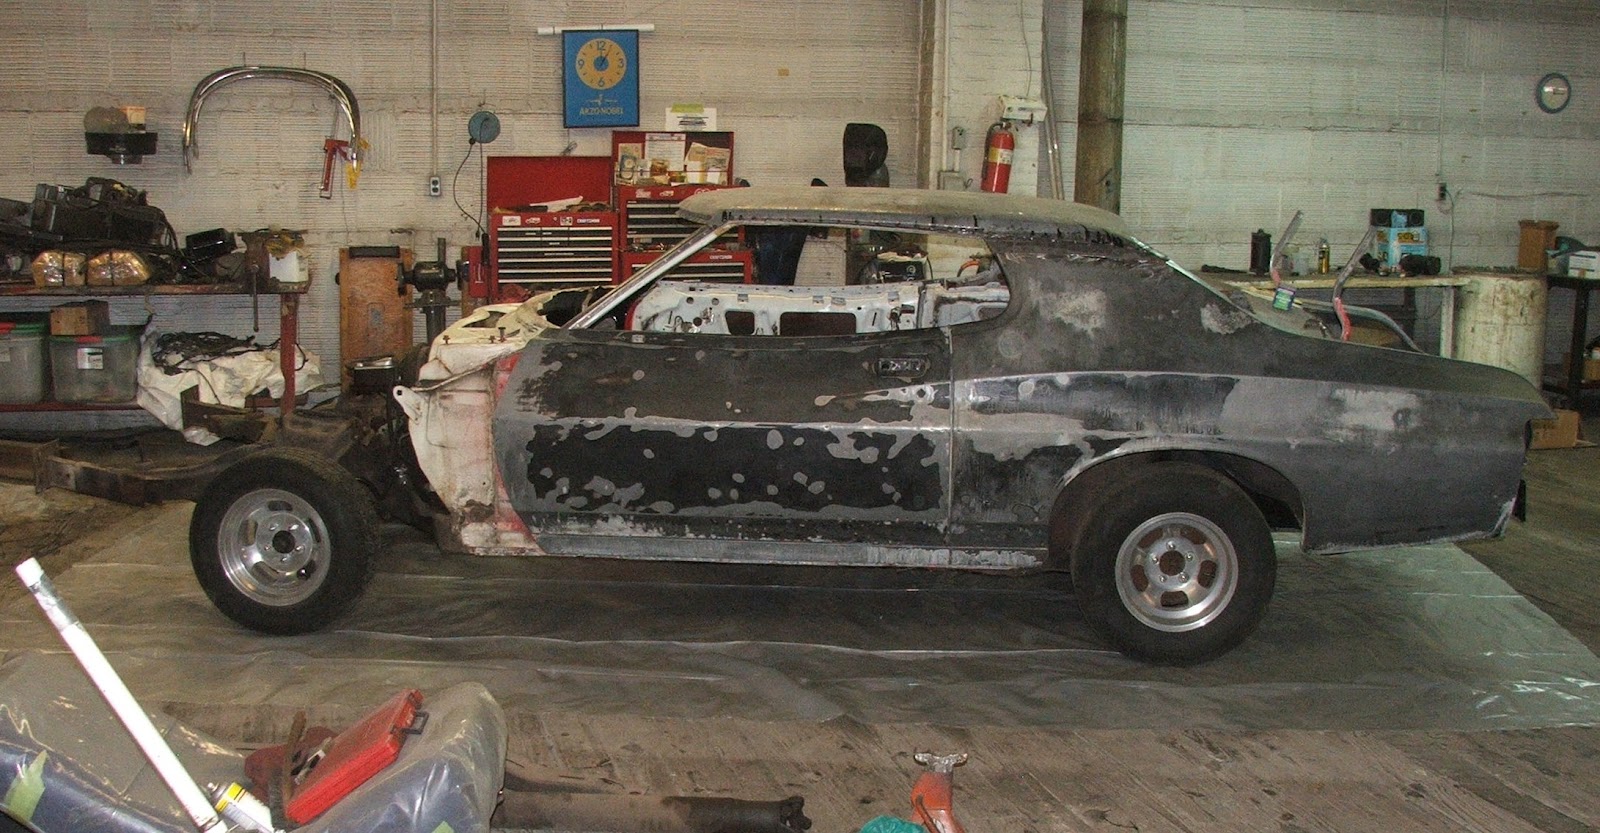
Well was finally successful in getting the engine and transmission out of the the Tomato Saturday and it was harder that I remember pulling engines to be!! Might be because I had several things working against me? Here's how things went....

First order of business was to make some room for pulling the drivetrain. I had the roof skin setting on a couple saw horses in front of the car that would definately limit my working area, so I had to find a safe place, out of the way, for the skin until I got the engine and tranny out. I looked around and thought "what safer place than back on the car?", so I gingerly got hold of it and eased it back into place on the Torino.


Next thing was to get the engine hoist up to the second floor. Rolled pretty easily on the concrete, but rolling it up the wooden access ramp, which is covered with expanded metal for traction, was a real PITA and should have been my first clue of the trouble which lay ahead!

With the cherry picker now on station, I then removed the transmission crossmember. I had to raise the transmission as high as possible, push the passenger side of the crossmember as far forward as possible and the driver side as far rearward as possible. Then, after getting a good grip on the driver side of the crossmember, a firm yank to the rear and out it came. CAUTION: the crossmember is VERY HEAVY so make sure you are out of the way when it falls...  ouch!

Now that the crossmember was out, I attached the lifting chain to opposite sides/ends of the engine and naturally, the chain was a bit too long (go figure!) so I had to choke it up a bit near the center. I rolled the lift into position, adjusted the grip on the chain so it would pick the engine straight up and started my first attempt....

NOTHING. The lift wouldn't move an inch. WTH?? I looked and the small diameter steel wheels on the lift were rotated 90 degrees to the direction I wanted to go and were wedged between the floor boards, so I set the engine back down, rolled the lift deeper into the car and rolled it back out to where I had it to re-orient the wheels in the right direction. Rehooked everything, lifted and rolled about 1" before getting stuck again. I fought it for another 45 minutes or so until I was ready to go postal, then decided I needed to call in reinforcements. A call to my brutha from a diff'runt Mutha, Jim Conley, and I had the Cavalry on the way!

When Jim arrived we were able to move it out another 3" or so until the exhaust manifolds started hitting on the control arms. We removed the manifolds from the heads to gain extra inches on both sides of the engine (made it soooooooooooo much easier!) and renewed our pull. Was moving forward, but we were experiencing resistance from someplace?? A closer look revealed the transmission cooler lines were clipped on the backside of the engine crossmember on the passenger side! On all the Ford smallblocks I had ever pulled, the cooler lines were clipped along the oil pan rail and came out with the drivetrain, so I neglected to look at how they were on a 460/C6. I had boogered mine up pretty good before I realized what was preventing the assembly from coming forward smoothly. Removed the clip and WHA-LA the engine and tranny were free! We set the assembly down on an old tire pressed into service as an engine bed and unhooked the hoist.


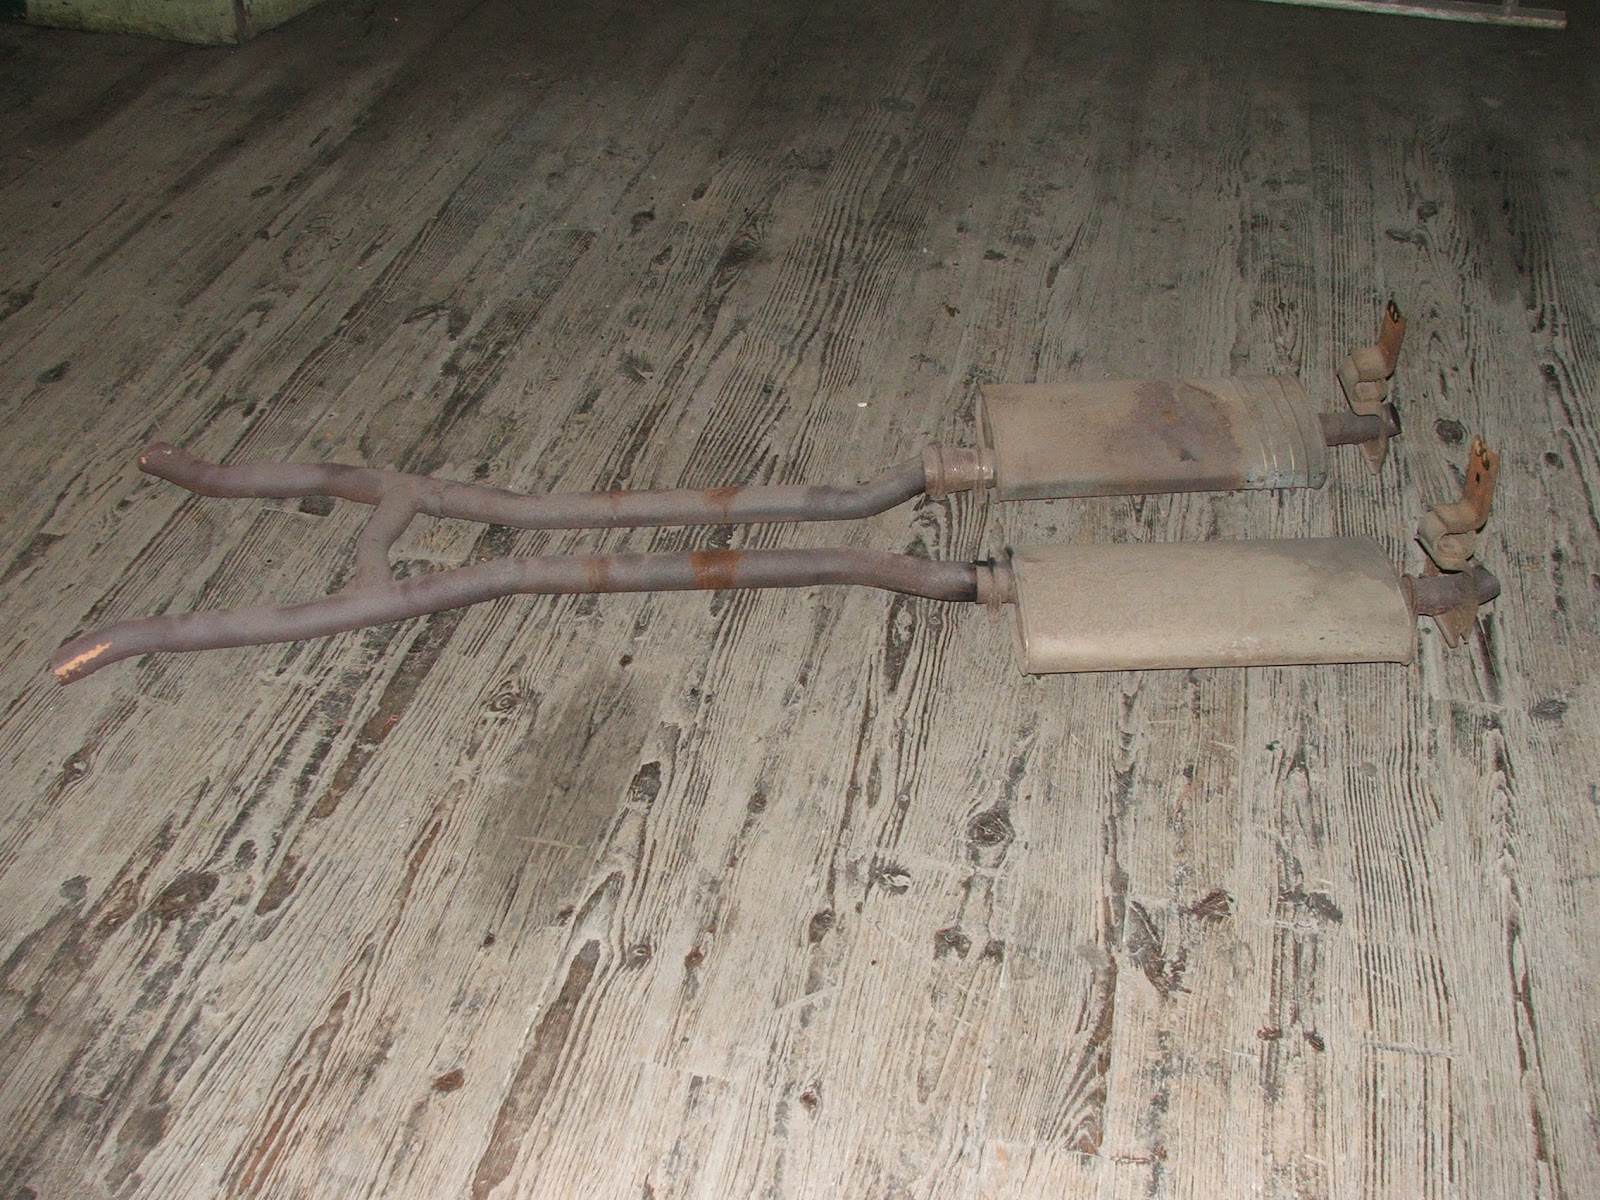
(check out those mangled cooler lines!!)


Before Jim departed I had him to help me take the lift back down the ramp to the service area. Was soooooooooooooooo much easier going down! LOL

With the Tomato much lighter, I was able to roll the Torino back and take up the old plastic which I had on the floor to prevent fluid leaks from seeping thru the floor and onto the service area below. Picked up all the loose debris from the floor, rolled out new plastic and moved the vehicle back onto her spot....


WHEW, she wore my hinney out this weekend, but the blood, sweat and tears were worth it knowing I am another step closer to having her ready for the body shop! A few more little items to take care of and off she goes!

I again want to give Jim Conley a great big THANK YOU for saving the day and helping me wrestle that 600lb hunk of cast iron out of the car... I OWE YA BIG TIME BRUTHA!!

Stay tuned....

ZEBRA 3 OUT

3/12/12

One more step...

A little more progress this weekend. Had to break out the sawsall because of the stubborn catalytic converter hardware... then I ran into issues getting the transmission crossmember out. Well everything is awaiting the cherry picker and dropping the crossmember (I know what to do now to get it out thanks to the guys on the GranTorinoSport.org forum!) and the drivetrain will be out and on the floor. A few shots of my progress on Saturday....


Well until next time....

ZEBRA 3 OUT

3/8/12

Up in the air...

Well another babystep last weekend. I got her up in the air and on jack stands but the catalytic converter/exhaust hardware kept me from getting any farther. Soaking the nuts in penetrating oil but if that doesn't do the trick, OUT COMES THE SAWSALL!!


Goal for this weekend is to get the drivetrain out of the car.

More to come....

ZEBRA 3 OUT